Falcon Run Apartments
Located in a quiet Englewood, Colorado neighborhood, Falcon Run offers Spacious 1, 2 & 3 bedrooms with the peace and beauty of suburban living and within minutes of the city or the mountains.

Falcon Run Apartments
Falcon Run is a family community, offering all the luxuries you expect plus conveniences close at hand - schools, a park and shopping.

Falcon Run Apartments
We have a great location being on a bus line and close to light rail for easy access to Downtown Denver.

Wednesday, October 31, 2012
Wednesday, October 24, 2012
Trick or Treat Alternatives
Posted by Larimer Associates on 11:50 AM
Do you want some alternatives to Trick or Treat this year? Here are some great Halloween events that are happening in the Denver area as an alternative to Trick or Treat.
Trick-or-treating may be tons of fun, but there are so many other wonderful things to do this Halloween season. The best part about Halloween is that it lasts all month long, so the whole family can head out and celebrate the spooky season every single weekend. Check out these five great options for Halloween fun for the whole family. Just be sure to get a few costumes this year since you’ll want to wear a new one to every one of these events.
Halloween Science
Denver Museum of Nature and Science
2001 Colorado Blvd.
Denver, CO 80205
(303) 370-6000
www.dmns.org
Date: October 28, 2012
The amazing people over at the Denver Museum of Nature and Science are ready to bring you another fun, educational way to celebrate the Halloween season with your little ones. Aimed at age four through first-grade level, this Halloween Science event will let your tyke create fog, make potions that will actually change colors and even create magical concoctions that you can eat . This magical class teaches all about the wizardry of chemical changes.
Trick-or-treating may be tons of fun, but there are so many other wonderful things to do this Halloween season. The best part about Halloween is that it lasts all month long, so the whole family can head out and celebrate the spooky season every single weekend. Check out these five great options for Halloween fun for the whole family. Just be sure to get a few costumes this year since you’ll want to wear a new one to every one of these events.
Bug-A-Boo
Butterfly Pavilion
6252 W. 104th Ave.
Westminster, CO 80020
(303) 469-5441
www.butterflies.org
Dates: October 27 and 28, 2012
This annual event at the Butterfly Pavilion is a great way for kids to enjoy all sorts of creepy-crawly fun, and actually learn a little bit along the way. Your children will learn all about spiders, tarantulas and scorpions with live, hands-on activities. Plus, make sure to wear that costume as there will be a costume parade, face painting, exhibits and trick-or-treating. Plus, you can also explore the amazing Butterfly Pavilion while there.
Corn Maze and Pumpkin Patch
Mazzotti Farms
21420 Weld County Road 8
Hudson, CO 80642
(303) 536-4089
www.mazzottifarms.com
Mazzotti Farms is a fantastic, locally-owned farm that grows delicious vegetables and fruits year-round. During the fall, however, the farm
really comes alive with Halloween fun. First, check out the Corn Maze, a
perfect scare-free maze for all ages. Then grab your own pumpkin
straight from the field and create your very own scarecrow. There is
also a giant slide, an authentic 18-foot teepee and a petting zoo. There
is so much to do at Mazzotti Farms for the Halloween season that you’ll
probably want to do it more than once. With the drive being under an
hour from Denver, there’s no excuse not to go back.
Mazzotti Farms
21420 Weld County Road 8
Hudson, CO 80642
(303) 536-4089
www.mazzottifarms.com
Mazzotti Farms is a fantastic, locally-owned farm that grows delicious
Halloween Science
Denver Museum of Nature and Science
2001 Colorado Blvd.
Denver, CO 80205
(303) 370-6000
www.dmns.org
Date: October 28, 2012
The amazing people over at the Denver Museum of Nature and Science are ready to bring you another fun, educational way to celebrate the Halloween season with your little ones. Aimed at age four through first-grade level, this Halloween Science event will let your tyke create fog, make potions that will actually change colors and even create magical concoctions that you can eat
Trick or Treat Train
Colorado Railroad Museum
17155 W. 44th Ave.
Golden, CO 80403
(303) 279-4591
www.coloradorailroadmuseum.org
Dates: October 27 and 28, 2012
For those fans of everything railroad and trains, this is the perfect Halloween treat. Visit Colorado’s fantastic Railroad Museum and enjoy a fun and safe place to take your kids in costume. The whole family will be able to take a ride in a vintage passenger car with all the conductors and engineers in full costume. As the train
stops, your spooky tyke can hop out and trick-or-treat and then get
ready for the next stop. There is also a “not-so-spooky” haunted railcar
and a silly-fun graveyard to visit. When you are all done, be sure to
check out the pumpkin patch and get plenty of great photos from your
visit.
For more information see CBS.
Colorado Railroad Museum
17155 W. 44th Ave.
Golden, CO 80403
(303) 279-4591
www.coloradorailroadmuseum.org
Dates: October 27 and 28, 2012
For those fans of everything railroad and trains, this is the perfect Halloween treat. Visit Colorado’s fantastic Railroad Museum and enjoy a fun and safe place to take your kids in costume. The whole family will be able to take a ride in a vintage passenger car
For more information see CBS.
Wednesday, October 17, 2012
Cheap Halloween Costumes!
Posted by Larimer Associates on 11:47 AM
Do your kids want costumes that are over $100 without the accesories. Here is a great story about a mom who took that $80 dollar costume and made the same thing for a lot cheaper.
It’s a down economy and a presidential election year—could there possibly be a MORE appropriate 2012 Halloween costume than a homemade Statue of Liberty designed for 5 bucks? I doubt it. (Hello, Humility? I’m sorry, she’s out to lunch.)
Last year my daughter came across a very nice Statue of Liberty costume in a catalog, but with torch, robe and crown, it came to about $80. While I was pleased about her costume choice considering the less-than-original-princess-and-fairy-costumes of years past, I decided I could do better with my own resources.
From around the house, we gathered the following for Lady Liberty:
Cardboard
Sage green paint leftover from a home-painting project
Black paint
A princess crown (for Liberty’s crown)
An empty ribbon spool (for torch)
Foam sheets used for packing breakable items (torch flame)
Small flashlight (torch “light”)
(Also needed: Ponytail holder, stapler, safety pins, scissors, markers and duct tape)
At the thrift store, we purchased:
Two sage green curtains, $5 (for robes)
Then we went to work. Here’s how it came together:

Instructions
• The Crown: Cut a cardboard piece to cover the entire front of any child’s princess crown; paint green and let dry. Once it’s dry, paint black rectangles across the green piece. Cut long, skinny triangles from cardboard; paint green. Once all paint is dry, attach front piece to crown with duct tape. Attach crown spires with a stapler. Touch up paint once crown is assembled, if necessary.
• The Torch: Paint a large empty spool of ribbon with green paint. Using markers, color foam sheets yellow and orange and cut 3-4 pieces into a tear drop shape for flames. Glue foam flames around the top inside edges of the spool, leaving a hole through the middle. Slide small flashlight into the spool with the light part up. If the flashlight doesn’t fit exactly, add more foam around the edges. When the flashlight is turned on, it makes a great Liberty torch that actually lights—fun for nighttime trick or treating!
• The Robe: I do not sew, but pinning curtains to
form a robe worked fine, and was less work for me. Only thing is, you
have to re-pin if you wear the costume again. Pin one curtain loosely
around child so it drapes around the body. Fold second curtain into a
long rectangle and drape over one shoulder like a sash; secure under the
other arm with a large ponytail holder (easier than pins, and
removable).
For more information see Colorado Parent.
It’s a down economy and a presidential election year—could there possibly be a MORE appropriate 2012 Halloween costume than a homemade Statue of Liberty designed for 5 bucks? I doubt it. (Hello, Humility? I’m sorry, she’s out to lunch.)
Last year my daughter came across a very nice Statue of Liberty costume in a catalog, but with torch, robe and crown, it came to about $80. While I was pleased about her costume choice considering the less-than-original-princess-and-fairy-costumes of years past, I decided I could do better with my own resources.
From around the house, we gathered the following for Lady Liberty:
Cardboard
Sage green paint leftover from a home-painting project
Black paint
A princess crown (for Liberty’s crown)
An empty ribbon spool (for torch)
Foam sheets used for packing breakable items (torch flame)
Small flashlight (torch “light”)
(Also needed: Ponytail holder, stapler, safety pins, scissors, markers and duct tape)
At the thrift store, we purchased:
Two sage green curtains, $5 (for robes)
Then we went to work. Here’s how it came together:

Instructions
• The Crown: Cut a cardboard piece to cover the entire front of any child’s princess crown; paint green and let dry. Once it’s dry, paint black rectangles across the green piece. Cut long, skinny triangles from cardboard; paint green. Once all paint is dry, attach front piece to crown with duct tape. Attach crown spires with a stapler. Touch up paint once crown is assembled, if necessary.
• The Torch: Paint a large empty spool of ribbon with green paint. Using markers, color foam sheets yellow and orange and cut 3-4 pieces into a tear drop shape for flames. Glue foam flames around the top inside edges of the spool, leaving a hole through the middle. Slide small flashlight into the spool with the light part up. If the flashlight doesn’t fit exactly, add more foam around the edges. When the flashlight is turned on, it makes a great Liberty torch that actually lights—fun for nighttime trick or treating!
A cute costume that was fun to make for just $5.
For more information see Colorado Parent.
Wednesday, October 10, 2012
Fall Pumpkin Recipes
Posted by Larimer Associates on 12:05 PM
Brown Eyed Baker
has ten great pumpkin recipes to get you ready for fall. Pumpkin is
what everyone craves this fall, and here are ten ways to put it into
your dinner plans.
Here they are, in alphabetical order:
1. Pumpkin Bread:

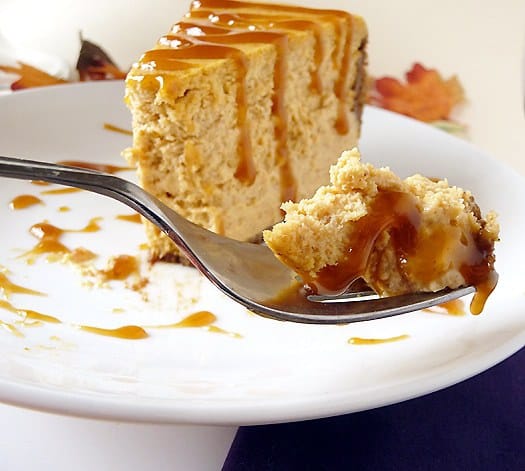
2. Pumpkin Cheesecake:
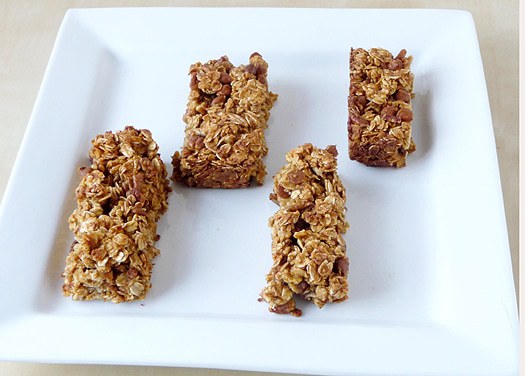
3. Pumpkin Cinnamon Chip & Pecan Granola Bars:
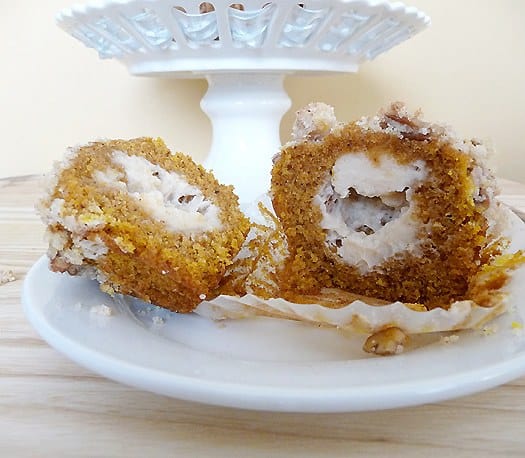
4. Pumpkin and Cream Cheese Muffins with Pecan Streusel:
5. Pumpkin Cupcakes with Cream Cheese Frosting:

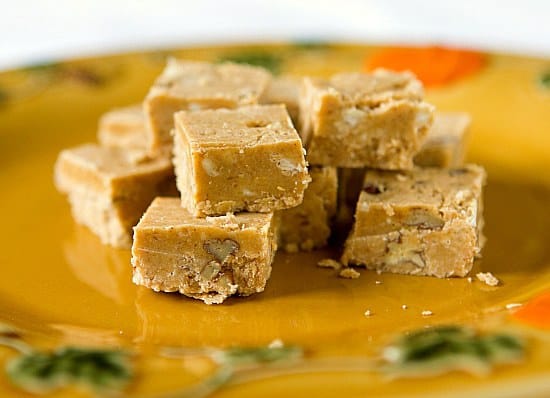
6. Pumpkin Fudge:
7. Pumpkin Pie:
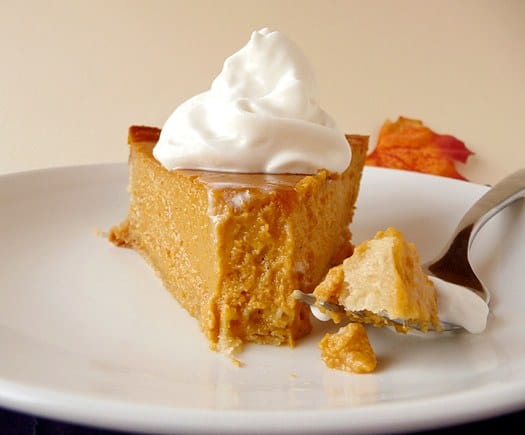
8. Pumpkin Pie Bars:
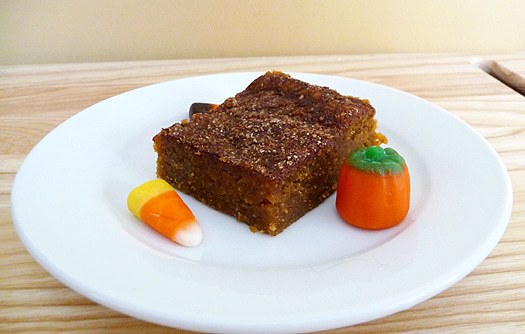
9. Pumpkin Scones with Spiced Glaze:
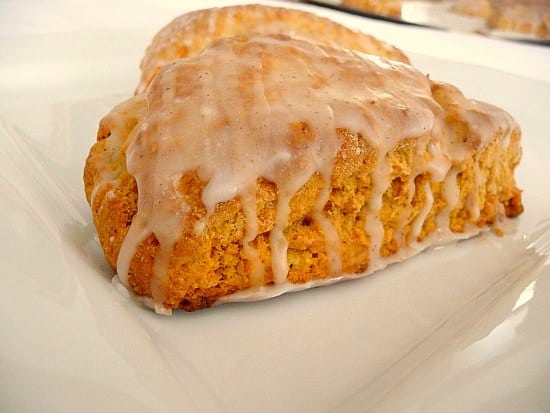
10. Pumpkin Whoopie Pies with Maple-Cream Cheese Filling:

Here they are, in alphabetical order:
1. Pumpkin Bread:

2. Pumpkin Cheesecake:

3. Pumpkin Cinnamon Chip & Pecan Granola Bars:

4. Pumpkin and Cream Cheese Muffins with Pecan Streusel:

5. Pumpkin Cupcakes with Cream Cheese Frosting:

6. Pumpkin Fudge:

7. Pumpkin Pie:

8. Pumpkin Pie Bars:

9. Pumpkin Scones with Spiced Glaze:

10. Pumpkin Whoopie Pies with Maple-Cream Cheese Filling:

Wednesday, October 3, 2012
DIY Folding Chair Makeover
Posted by Larimer Associates on 11:01 AM
If you have a lot of company over, it can be hard to accommodate
everyone for seating. Here is a great do it yourself tip to take a
plain folding chair and turn it into a great furniture piece. Keep
reading to find out how to have enough chairs for everyone without
breaking the bank.

MATERIALS // folding chair, screwdriver, drop cloth, spray paint (2 cans per chair), fabric (20″ x 20″ piece per chair), scissors, staple gun and staples

STEPS // 01 REMOVE EXISTING CUSHION Using screwdriver, remove existing cushion from chair frame and set aside.

02 PAINT CHAIR // In well-ventilated area, place chair on drop cloth and wipe down with damp towel. Using slow side-to-side movements, apply two thin coats of spray paint (refer to paint can instructions for drying time between coats). Let chair dry overnight. Tip: If chair is dark color or smooth finish, apply primer before painting with desired color.

03 RECOVER EXISTING CUSHION // Lay out new fabric and place seat cushion face down. Trim fabric along edge of cushion (approximately 3″ from edge). Once cut, attach fabric using staple gun. Begin by stapling at the center of each side and then at the corners. Tip: If using a patterned fabric, be sure to align to your liking prior to stapling.

04 ASSEMBLE CHAIR // Once chair is dry, assemble with new cushion and begin using!

 For more information see MakeKind.

MATERIALS // folding chair, screwdriver, drop cloth, spray paint (2 cans per chair), fabric (20″ x 20″ piece per chair), scissors, staple gun and staples

STEPS // 01 REMOVE EXISTING CUSHION Using screwdriver, remove existing cushion from chair frame and set aside.

02 PAINT CHAIR // In well-ventilated area, place chair on drop cloth and wipe down with damp towel. Using slow side-to-side movements, apply two thin coats of spray paint (refer to paint can instructions for drying time between coats). Let chair dry overnight. Tip: If chair is dark color or smooth finish, apply primer before painting with desired color.

03 RECOVER EXISTING CUSHION // Lay out new fabric and place seat cushion face down. Trim fabric along edge of cushion (approximately 3″ from edge). Once cut, attach fabric using staple gun. Begin by stapling at the center of each side and then at the corners. Tip: If using a patterned fabric, be sure to align to your liking prior to stapling.

04 ASSEMBLE CHAIR // Once chair is dry, assemble with new cushion and begin using!

 For more information see MakeKind.


